

Building a Power Supply in a Framework Expansion Card
If you've read the multimeter post, you already know the DockFrame pitch: a modular USB-C dock built around the Framework Expansion Card format, hosting standard Framework cards and our own Tool Cards. Multimeter went first. This is the second one.
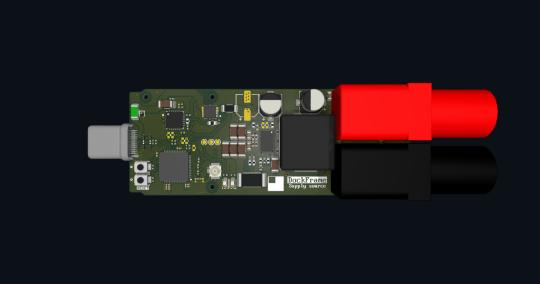
This post is about the Power Supply Card, a programmable bench supply that lives in a slot of your dock, takes everything it needs from USB-C Power Delivery, and gives you a regulated, current-monitored output on a pair of banana jacks. Same form factor as the multimeter. Completely different problem.
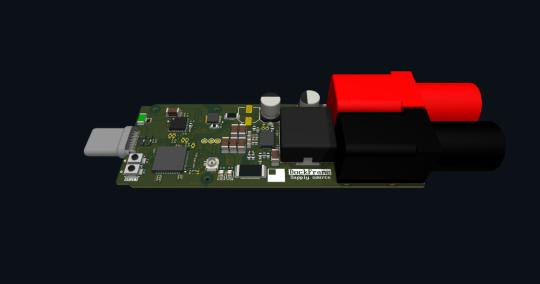
A bench supply is easy. This one is not.
Hand any competent EE the task "build a programmable bench supply" and they'll ship a 1U box in a few weeks. A transformer, a switching front end, a buck-boost stage, an I²C-controlled reference, a current sense, a microcontroller, a knob. Textbook design for thirty years.
Tell them "build a programmable bench supply that fits inside a Framework Expansion Card, sources its power from USB-C PD instead of mains, runs both above and below the negotiated input rail, talks WiFi and Bluetooth, and survives someone shorting the probes" and the problem changes.
There's no transformer. There's no fan. There's no headroom. You can't oversize the inductor and you can't oversize the buck-boost FETs, because both eat board area you don't have. Your input voltage itself is contested, whatever the dock's PD source agreed to hand over, not whatever you wanted. You're regulating that rail to a programmable output, with the control loop, the current sense, the MCU, and a 2.4 GHz antenna all crammed into roughly the volume of a thumb drive.
Power from a port, not a wall
A normal bench supply plugs into the mains and you stop thinking about its input. This card never gets that luxury.
DOCKFRAME HUB  ───►  USB-C PD VBUS (5 / 9 / 15 / 20 V)
                       │
                       ▼
                 STUSB4500QTR  ──► negotiates the PD contract
                       │              (CCx, 20 V PDO requested)
                       ▼
                 INA180A2      ──► input current telemetry → ESP32
                       │
                       ▼
                 STL6P3LLH6    ──► P-FET load switch / soft-start
                       │
                       ├──► AP64060WU-7 ──► +5 V (system)
                       │                       └─ SY8089A1AAC ──► +3V3 (ESP32, I²C, logic)
                       │
                       └──► TPS55289RYQR ──► PROGRAMMABLE USER OUTPUT
                                              ├─ I²C control (V, I, slew, OCP)
                                              └─ CS feedback to ESP32
                                                         │
                                                         ▼
                                                  banana jacks
The PD sink is an STUSB4500QTR, configured to ask the host for the highest contract it will give us, up to 20 V. If you plug the dock into a host that only does 5 V, you still get a working supply, just with a smaller usable range. Graceful degradation matters: you don't want a tool that goes silent the moment the upstream gets stingy.
The output stage is a TPS55289RYQR, a 30 V I²C-programmable buck-boost. Buck-boost is the load-bearing word: it lets the card deliver outputs both below and above the negotiated PD rail. A 9 V-only host can still produce 12 V on the jacks. Voltage setpoint, current limit, slew rate and OCP behaviour are all programmed by the ESP32-S3 over I²C, with the buck-boost's own CS pin and the input-side INA180 closing the telemetry loop without a separate ADC.
Between the PD sink and the buck-boost sits a P-FET load switch (STL6P3LLH6-TP). Soft-start, hot-plug behaviour, and a hardware-level kill switch when firmware misbehaves.
Heat in a thumb drive
The part we kept fighting was thermal.
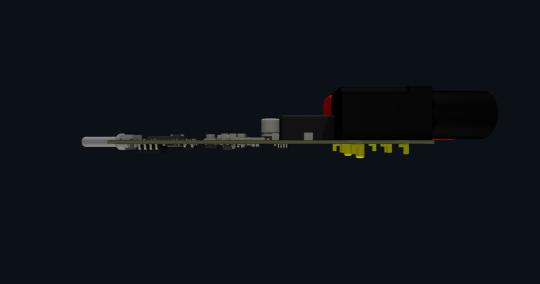
A buck-boost shoving an amp through a switching node loses a watt or two in the FETs, the inductor, and the bulk caps. On a benchtop instrument you mount the IC to a piece of aluminium and forget about it. On this card, the IC sits inside a plastic enclosure with millimetres of air on every side, and "mounting to aluminium" means a 4×4 mm exposed PowerPAD with whatever copper you can spare on the back layer.
The first review caught it: the TPS55289's GND PowerPAD had zero thermal vias. Easy to miss in a hand-routed layout, very hard to recover from once the boards are back from fab. The fix was to drop three 0.5 / 0.3 mm vias directly onto the pad, then stitch another ~107 GND vias across the buck-boost stage and the bottom board edge. Junction-to-ambient went from indeterminate to roughly 55 °C/W, which puts the IC at about 37 °C above ambient at full load. Survivable. Not aluminium-block-comfortable.
The SW1 and SW2 pads, by contrast, stay deliberately un-stitched. Stitching a switching node to a copper pour is a noise broadcast, not a heatsink.
What the radio is doing in here
Same uncomfortable question as the multimeter, same uncomfortable answer.
We kept the ESP32-S3R8 because we wanted WiFi and BLE on every Tool Card. A power supply you can drive from your phone, or from a script on the laptop, is a fundamentally different tool than one with a knob. The cost of that decision is a 2.4 GHz radio sharing an enclosure with a 20 V switching converter.
Antenna placement isn't ideal. It can't be. We pushed the buck-boost stage to one end of the card and the MCU and antenna to the other, then accepted that the noise floor in the radio band is going to look worse than the reference layout suggests. PoC will tell us by how much. If we can't route our way out of it, the next revision gets a u.FL pigtail and an external antenna outside the enclosure.
Ship, measure, decide.
How you actually use it
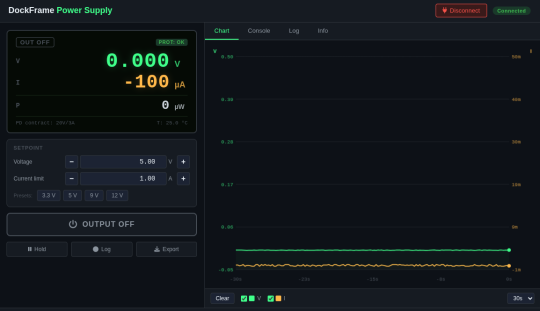
Same call as the multimeter on the host-side software: no drivers, no installers, no account, no cloud. Open a page in your browser, click Connect, you're talking to the card.
The wire protocol is plain text at 115200 baud over USB CDC. SET:V 5.0, SET:I 0.5, OUTPUT ON, READ. Nothing clever. Easy to script against, a for v in 3.3 5.0 9.0 12.0 sweep is a one-liner.
The browser app reuses the multimeter app's shell, with the readout swapped for a setpoint pad (voltage, current limit, output enable) and a live chart of measured V and I at the jacks. CSV export, serial console, the whole thing static files served from a single page.
The mobile angle is what we're most curious to see in the wild. The same ESP32-S3R8 that drives USB CDC also has BLE, so the plan is a phone app that pairs to the card and gives you setpoint control without a laptop in the loop. Walk over to whatever you're powering, change the rail, walk back. The Tool Card is the only thing on the bench.
Both apps will be free and open source. The card never talks to a cloud, you never make an account, and nothing leaves your own machines.
What the review process keeps catching
We're building in public, so here's the honest version. This card started life as a fork of the multimeter card, lost everything that wasn't a power supply, then grew a PD sink, a wide-input buck, and a programmable buck-boost. Three significant re-architectures before the schematic settled.
The first pre-fab review flagged six blocking issues. The next two passes cleared four of them, the antenna got a proper u.FL footprint, the input load-switch FET got thermal vias, the RF feedline got cleaned up, and the TPS55289 PowerPAD got the stitching it should have had on day one. Two blockers are still open as of this week: solder-mask bridges across the 16 DNP footprints, and absent fiducials on the bottom layer. Both get fixed before gerbers leave the bench.
Spreadsheets and nitpicking. It's also the only reason the first PoC has a chance of coming back working.
What's next
The first PoC batch is queued up behind the multimeter. Once boards are in hand: load regulation across the full PD contract range, line regulation against a flaky host, ripple at the jacks under 0→2 A current steps, thermal soak at the worst-case operating point, and BLE range with the card sitting in a fully populated dock right next to the host's own radios.
If it survives all that, the Power Supply Card slots in as Tool Card #2. After that the queue is logic analyzer, GPIO/UART breakout, oscilloscope module, SWR analyzer. Each one a card you keep docked, not a box you clear shelf space for.
What the community is telling us
We're past 1,300 signups on hwlab.io/dockframe, and the Power Supply Card has picked up its own constituency along the way. Nearly a hundred of you named it specifically in the freeform feedback, engineers tinkering with ESP32s and Pis next to their Framework, an auto tech who wants both a meter and a supply on the same dock, a phone-modder running TEC coolers, a festival lighting rigger shrinking a tool-bag, electronics teachers, ham radio operators.
The most useful quote we got is also the one we couldn't have written ourselves:
"The power supply is what really intrigues me. I'm using a bench power supply now to test some fans/TEC coolers for a custom phone case. It would be cool to software-define the voltage/amperage instead of hand-tuning with knobs."
That's exactly the pitch. A programmable supply that lives in a slot of the dock you already own is in a different category than a benchtop unit. It changes the question from "do I need a 1U bench supply badly enough to give it desk space" to "do I want one in slot three today."
A handful of you also flagged safety, protection circuits, a replaceable fuse, an electronic fuse option, predictable behaviour when the host disappears mid-load. All of it landed in the review pile, and a lot of it has already affected the design. If you have ideas, tell us here.
Why this matters
Designing for this form factor isn't "shrinking" a bench supply. Component choice is dictated by volume. Thermal design is a fight over millimetres of copper on the wrong side of the board. Antenna placement is never ideal. Every decision is a compromise, and you don't find out who was right until the boards come back.
We want the Power Supply Card to be the kind of tool you leave docked. Reliable enough to trust, compact enough to forget about, good enough that you reach for it before the benchtop unit for anything that isn't a precision calibration job. That's the bar. The first PoC is the first real test of whether we hit it.
DockFrame is a modular USB-C hub for Framework laptop users, makers, and engineers. Open source hardware, open process. Follow us on GitHub, join the Discord, or tell us what you want to see.
Support Us on Crowd Supply
We’re on Crowd Supply, and we need your help to bring DockFrame to more people. Your backing makes it possible to keep prices low and quality high, so everyone can enjoy the power of an open-source modular USB Hub ecosystem.

Check out the campaign and get involved: DockFrame on Crowd Supply

